
I started making mead in 2003. Most people start with the Compleat Meadmaker by Ken Schramm. I did too. I have my signed copy, but I haven’t actually read it since about 2004. I started making wine from fresh grapes in 2008, and it influenced how I made mead. I started making beer in 2013, and it too influenced how I made mead. This article condenses my nearly 16 years of experience in making mead. It’s a long article, but I didn’t want to split up the content. So here it is.
Let’s start with a few definitions: Session Mead (hydromel); Standard Mead; and Sack Mead. Per the 2015 Mead Style Guidelines from the Beer Judge Certification Program (BJCP), the “strength” of mead is classified as Hydromel, Standard, or Sack.
Strength. A mead may be categorized as hydromel, standard, or sack strength. Strength refers to the alcohol content of the mead (and also, therefore, the amount of honey and fermentables used to make the mead).
Personally, I hate the term “hydromel” which basically means watery mead. So, I prefer to use the term “Session Mead” for anything that I make in the 6% to 10% ABV range. The alcohol level of Standard Mead would be in the range of 12% to 16% ABV which is typical of table wine. And Sack Mead would be 18% ABV and beyond. There is an assumption that the higher the alcohol level, the more honey aroma and flavor will be present due to the increase in fermentable sugar. Yet a bone-dry mead at 16% ABV and dessert sweet mead at 8% ABV can have about the same amount of honey in the recipe. It all depends on the brewing process – what yeast is used; whether all the fermentable sugars are consumed in fermentation; whether or not the product is back-sweetened after fermentation; what the product is back-sweetened with (honey or cane sugar). But in general, a session mead is going to start with a lower original gravity (less fermentable sugar) than a standard mead which has a lower original gravity that a sack mead.
Session Mead and Ale Yeast
I use ale yeast when I am making a session mead. Ale yeast produces a different flavor profile than wine yeast. With the right ale yeast, the yeast can accentuate the honey character in the product to overcome the lower levels of honey in the recipe. I am particularly fond of Wyeast 1318 (London III). My second favorite is 1728 (Scottish Ale). I have had good results in yeast trials with 1335 (British Ale III); 1968 (London ESB); 1214 (Belgian Abbey Style); 1762 (Belgian Abbey Style II); and 3787 (Trappist Style High Gravity). The three Belgian style yeasts – 1214, 1762, and 3787 – are very good for making a stronger mead at 10% to 12% (nearly a standard mead) but with different flavors than you would get with a wine yeast.
A key feature of ale yeast is “attenuation” which means the yeast does not consume all of the available sugar during fermentation. Most ale yeasts will consume between 65% and 80% of the available sugar during fermentation, and different ale yeasts attenuate at different levels. This allows a brewer to produce dryer or sweeter products by changing the yeast strain during fermentation. For any given yeast, there will be variations in the attenuation depending upon the type of sugar available – simple sugars vs complex sugars as well as the fermentation temperature and other factors.
My favorite yeast, 1318, generally attenuates at around 75% in beer (malt sugars). It attenuates at dramatically different levels in other products. In cider, it attenuates at around 90% because apple juice is primarily simple sugars. In mead, the results are all over the place depending upon the type of honey used and the type of fruit used. This makes it nearly impossible to predict in advance whether the product will finish sweet or dry. It also makes bottle conditioning extremely unpredictable (can you say “gusher”?). While I love the flavor produced by the yeast, I have given up on bottle-conditioning anything I make with it. So, I almost always back-sweeten to taste; stabilize with potassium sorbate; then keg and force carbonate.
Small-Scale Kegging
A big challenge for beginners is how to keg and force carbonate small batches if you are not already set up to keg beer. The answer is that there is a growing marketplace for mini-keg and/or stainless-steel growlers which have lids with connectors for micro-regulators and picnic taps. There are many products available on the market (go peruse Amazon) and the variety of products can be confusing.
A key issue is whether or not you want compatibility between small-scale kegging equipment and the standard kegging equipment used by most home brewers. In my case, I was already well-equipped with standard ball-lock equipment, so I focused on finding mini-kegs, micro-regulators and taps using ball-lock connectors. For me, I generally force carbonate in standard sized equipment. Yet, there are times when I want to dispense to a small system so that I take products to a party or class and then dispense under typical CO2 pressures. But I also want to be able to force carbonate an experimental batch without tying up my full-sized equipment. So, I looked for small-scale equipment with ball-lock connections.
Here is a small sample of equipment you can find in the marketplace (these examples are all ball-lock connections):
Small Cornelius kegs:
• 1 ¾ gallon kegs (shorter versions of a standard 5-gallon keg) $85
• Mini-regulator (get one that goes up to 25+ PSI to support force carbonation) $80
• One-time use (non-refillable) 74gr CO2 cartridge $ 5
• Keg Faucet (complete with ball-lock connector) $35
Mini-kegs (growlers):
• 5L stainless-steel growler/mini-keg (also available in 2L, 4L, and 10L sizes) $55
• Ball-Lock lid for growler/mini-keg $35
• Micro-regulator (get one that goes up to 25+ PSI to support force carbonation) $45
• One-time use (non-refillable) 16gr CO2 cartridge (go buy in bulk on Amazon) $ 2
• Picnic tap faucet and line $11
Note: I have purchased from Williams Brewing in the past and have been happy with the quality and their prices. I have at least one of everything in the list above. I have also purchased from other suppliers and have been just as happy. All the ball-lock parts are standard and will work with any ball-lock keg or mini-keg. I have no idea if the size and threading of ball-lock lids for growler/mini-kegs is standardized so that products from different manufacturers will be compatible. As of this time, I have only purchased from the single manufacturer linked above.
Session Mead Recipes:
Finally, we get to the point. What do I put in the primary to make a nice fruit mead? Here is a generic recipe for session mead that will produce one gallon of finished product:
• 2 lbs of honey
• 3 lbs of frozen fruit
• 1 gallon of water
• 1 package of ale yeast
This will produce about 8% alcohol by volume (ABV) assuming the product finishes nearly dry. You can bottle condition the product assuming you want semi-dry to dry product. Otherwise, you can back-sweeten to taste, then stabilize, keg, and force carbonate. For quick and simple fruit meads, I generally back-sweeten with cane sugar. If you back-sweeten with honey, it will get cloudy all over again and may not clear back up (depending on the honey you are using).
One thing to note is that acid and tannin levels will vary dramatically by the type of fruit you use. I know some people that like dry mead, but they are in the minority, so most meads are packaged semi-sweet to sweet. Therefore, a decent level of acid (similar to wine) is pretty much a requirement to balance the sweetness of most meads. Tannins are optional in mead, but I think they are highly desirable. Thus, the mead maker needs to understand how much acid and tannin are in the fruits used to make mead to keep everything in balance. Fortunately, there are websites out there that provide detailed acid and tannin level information on a wide variety of fruits used to make wine and mead.
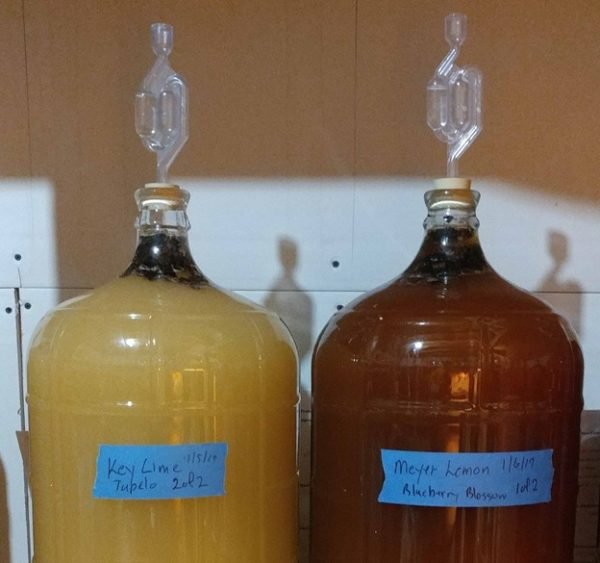
The following are two example meads that I am making for a class this spring. All the ingredients, except for the yeast, were purchased at Walmart or Target.
Blueberry Melomel
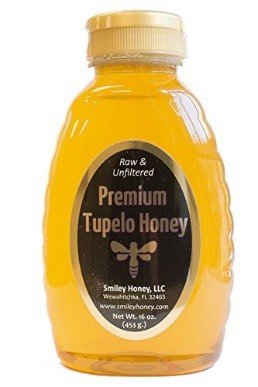
• 2 lbs of Nature Nate’s Raw Unfiltered Honey (presumably clover)
• 3 lbs of Wild Blueberries
• 2 Meyer Lemons, zested and juiced (not shown)
• 1 gallon of drinking water
• 1 pkg of Wyeast 1318 London III ale yeast

Blueberries are very low in acid. So, the zest and the juice of two large Meyer lemons is added to boost the acidity and provide a wonderful secondary aroma to the blueberry mead. Note that Meyer lemons have far less acid that normal lemons. Use only one large lemon if using regular lemons.
All these ingredients will go into the primary. Fermentation is done on the whole fruit to provide the maximum extraction of color, aroma, and flavor from the fruit.
This recipe produced a sugar concentration of 15.2° Brix (refractometer reading) which is equivalent to 1.062 S.G. and 8.3% potential alcohol.
Raspberry Melomel
• 2 lbs of Nature Nate’s Raw Unfiltered Honey (presumably clover)
• 3 lbs of Raspberries
• 1 gallon of drinking water
• 1 pkg of Wyest 1318 London III ale yeast

Raspberries are fairly high in acid. No adjustment is needed to make a well-balanced product. As before, all ingredients go into the primary. Note that raspberries mostly disintegrate in the primary. The product will probably need to be poured through a strainer at some point to remove all the bits and pieces of raspberry pulp from the product. This can be done as late as the final racking into a bottling bucket just before packaging.
This recipe produced a sugar concentration of 14.8° Brix (refractometer reading) which is equivalent to 1.060 S.G. and 8.1% potential alcohol.
Standard Mead and Wine Yeast
Most mead makers try to make standard strength mead or sack strength mead and will use wine yeast to achieve anywhere from 12% ABV to 18% ABV or more. Some general considerations:
• The strain of wine yeast used to make mead can have a dramatic impact on how long it takes the mead to mature (mellow out enough to be pleasant to drink).
• The higher the alcohol level, the longer the mead takes to mature.
• The higher the sweetness level, the easier it is to cover up the fact that the mead is still too young to drink.
So, a sweet mead at 12% ABV will be pleasant to drink much sooner than a bone-dry mead at 16% ABV.
Other important considerations:
• Wine yeast can only survive until the alcohol concentration hits a certain level – its alcohol tolerance. Note that ale yeast also has an alcohol tolerance but it rarely comes into play in beer or session mead.
• The alcohol tolerance of yeast varies by the strain of yeast – it typically ranges from 14% ABV to 18% ABV.
• Wine yeast does not attenuate; it will consume all the available sugar until it hits its alcohol tolerance and then it will stop fermenting.
One method to make sweet mead is to exceed the alcohol tolerance of the yeast. After the yeast hits is alcohol tolerance, any remaining sugar will not be fermented. So, you can start with a lot of honey or you can make honey additions during fermentation. Either way, this will result in the yeast hitting its tolerance and leaving residual sweetness in the product. This process is easy to abuse in my opinion. I know lots of people that will use champagne yeast to make syrupy-sweet mead at 18% ABV using this process. I generally loathe these meads.
Another method is to start with just enough fermentable sugar to hit a desired alcohol level (somewhere lower that the alcohol tolerance of the yeast). The yeast will consume all the available sugar then fermentation will stall out leaving a dry product (basically how dry red wine is made). If sugar is added after this point, the yeast will start to ferment the added sugar. To prevent this, potassium sorbate is added first. The sorbate will prevent the yeast from fermenting any added sugar. Thus, one can make a sweet mead at a target alcohol level below the alcohol tolerance of the yeast. This is generally what I do.
There are a lot of options out there for wine yeasts. I have only used the products from Lalvin. I have done yeast trails with five strains of yeast (shown below) that are commonly found in home brew shops:

I’ve taken the results of my yeast trials to tastings when the products were about 4 months old, 9 months old, and 15 months old. In the earliest tasting (when the products were about 4 months old), 71B was the clear winner. It matures far sooner than any other yeast. RC-212 came in second place. D-47 was blah. K1V-1116 and EC-1118 (champagne yeast) were pretty terrible at that point. In the second tasting, (when the products were about 9 months old), RC-212 was considered the best having the richest, most complex flavor. But 71B was still a strong contender. D-47 and K1V-1116 were considered mediocre, and EC-1118 still was harsh and unpleasant. In the final tasting (when the products were about 15 months old), RC-212 was still in 1st place, and 71B was still a strong 2nd. K1V-1116 was finally maturing and pleasant to drink. D-47 was still bland and boring. EC-1118 still was harsh and unpleasant.
Let me be clear. Champagne yeast is for making dry sparkling white wine, and it sucks in almost every other application (I don’t care what the chart up above says). Wine kits universally include EC-1118 because it is almost impossible to have fermentation failures using this yeast (it is aggressive, ferments fast, and will overcome most spoilage organisms unless you really, really fuck up sanitation). However, that does not make it a good yeast that produces good mead or wine. {Should you ever buy a wine kit, pick up a packet of 71B for a white wine or RC-212 for a red wine and throw away the EC-1118}
In summary, if you are a beginner (I know you are not going to wait a year to drink your first batch) use Lalvin 71B. When you get to the point you have the patience to wait a year to drink your meads, both 71B and RC-212 are very good options. K1V-1116 produces nice characteristics in dark, bold fruits (think tart cherries, black currants, etc). D-47 will always be bland, so don’t bother. Don’t ever user EC-1118. {My opinions; your mileage may vary.}
Bottling Standard Mead
Bottle conditioning wine or mead that was made with wine yeast is a complex process (see méthode champenoise) that is an entire article by itself. This is not for beginners, so we will assume that everyone is packaging still (uncarbonated) products. There are three basic options at this point:
• Wine bottles sealed with a cork
• Beer bottles sealed with a cap
• Beer bottles sealed with a swing top (grolsch bottles)
Whether they are trying to cork or cap a bottle, most beginners start with the cheapest piece of equipment they can get their hands on. This results in poorly sealed bottles that tend to leak and also tend to produce grumpy brewers. I, on the other hand, have a habit of going big. My first corker was the little red “Portuguese” floor corker. I put 1500 or so corks through it. I eventually sold it and then went up scale to the blue “Italian” floor corker. I have put a couple thousand corks through it, and it is working great. I highly recommend starting with a floor corker if you have any intention of using standard wine bottles and corking them. My first capper was a light-weight bench capper that worked reasonably well, but one of the plastic parts broke after several hundred caps. There are no replacement parts, so I bought a second. Later, I bought two heavy-duty bench cappers on sale and gave away the one with the plastic parts. I bought two cappers so that I can bottle 12 oz and 22 oz (or 750 ml) bottles without resetting the equipment in the middle of a batch.
For beginners, I would recommend the grolsch bottles. No equipment required to seal the bottle, and the product isn’t going to sit around long enough to benefit from bottle-aging in a standard wine bottle with a cork closure.
Standard Mead Recipes
One of the first considerations for the mead maker is to decide how to balance the honey and fruit characteristics in the final product. The honey can provide the primary aroma and flavor with the fruit in a supporting role. Or the fruit can provide the primary aroma and flavor with the honey in a supporting role. Or the honey and fruit can be in roughly equal balance. All three choices are considered legitimate, and I have made all three types of products. Some basic considerations:
• Honey can be quite expensive. So, using a lot of high-sugar fruits or fruit-juices can allow less honey to be used thus saving a few bucks. Note that this skews the flavor profile towards the fruit in the finished product.
• Fresh fruit is generally far to expensive to use in brewing unless you have direct access to the producer of the fruit and can buy it cheap. Store-bought fresh fruit is picked partially ripe and allowed to ripen on the way to the store with negative impacts on aroma, flavor, and sugar levels.
• Frozen fruit is generally much less expensive than fresh fruit. And it is picked ripe and then flash frozen; so, it is actually better fruit for brewing. Freezing fruit also helps release the juice in the fruit. So, even if you acquire fresh fruit, it is still a good idea to freeze it.
• Processed juices are generally much less expensive that frozen fruit. It is quick and easy way to add a lot of fruit flavor to mead. However, some of the nuance in the aroma and flavor is lost in the processing of the fruit into juice (see the wine article on how wine kits are made).
• A nicely balanced product can be made at a reasonable price by using some combination of honey, frozen fruit, and fruit juice.
Thus, we have three generic recipes that produce a gallon of finished product:
Honey forward mead
• 2 ¾ lbs (~1 qt) of honey
• 2 to 3 lbs of frozen fruit
• 1 gallon of water
• 1 package of wine yeast
This recipe will finish dry with any wine yeast and will produce 11% to 13% alcohol by volume (ABV) depending upon the fruit.
Fruit forward mead
• 2 lbs of honey
• 2 to 3 lbs of frozen fruit
• ½ gallon of fruit juice
• ½ gallon of water
• 1 package of wine yeast
This recipe will finish dry with any wine yeast and will produce 12% to 14% alcohol by volume (ABV) depending upon the fruit and fruit juice.
Balanced mead
• 2 ¾ lbs of honey
• 2 to 3 lbs of frozen fruit
• ½ gallon of fruit juice
• ½ gallon of water
• 1 package of wine yeast
This recipe will finish dry with most wine yeasts and will produce 13% to 16% alcohol by volume (ABV) depending upon the fruit and fruit juice.
Any of these recipes can be back-sweetened with sugar or honey and stabilized with potassium sorbate prior to bottling.
The following are two more example meads that I am making for a class this spring. Again, all the ingredients, except for the yeast, were purchased at Walmart or Target.
Triple Berry Melomel
• 2 lbs of Nature Nate’s Raw Unfiltered Honey (presumably clover)
• 3 lbs of mixed Raspberries, Blackberries, and Blueberries
• 2 quarts of White Grape Juice (Niagra)
• 2 quarts of drinking water
• 1 pkg of Lalvin 71B wine yeast

Raspberries, blackberries, and white grape juice all have plenty of acid in them. The acid level in this product will be noticeably higher than in either of the two session meads above. This product will need to be back-sweetened to at least semi-sweet to be in balance. As always, all these ingredients will go into the primary.
This recipe produced a sugar concentration of 20.4° Brix (refractometer reading) which is equivalent to 1.085 S.G. and 11.8% potential alcohol.
Dark Sweet Cherry Melomel
• 2 lbs of Nature Nate’s Raw Unfiltered Honey (presumably clover)
• 3 lbs of Dark Sweet Cherries
• 2 quarts of White Grape Juice (Niagra)
• 2 quarts of drinking water
• 1 pkg of Lalvin 71B wine yeast

Dark sweet cherries have some acid, but not a lot. The white grape juice in the recipe provides the acid to give the finished product the proper structure. The acid level in this product will be similar to the two session meads above. This product can to be back-sweetened from semi-dry to semi-sweet and be in balance. As always, all these ingredients will go into the primary.
This recipe produced a sugar concentration of 22.6° Brix (refractometer reading) which is equivalent to 1.095 S.G. and 13.3% potential alcohol. Note that cherries have a lot more sugar than most berries.

Making the Example Recipes
All these example recipes state they will make 1 gallon of finished product. A lot more than 1 gallon of volume is going into the primary, so the primary needs to have plenty of room for honey, water, juice, and whole fruit plus headspace for the foam that is produced during fermentation.
I am using a 2 ½ gallon plastic bucket with a screw top as a primary fermenter for these small, experimental batches.
A ½ inch hole is drilled in the lid for the bucket. A standard grommet (found on the lids of most commercial wine pails) is inserted into the hole. An airlock is inserted into the grommet to allow CO2 to escape during fermentation.
After 3 weeks in the primary, I rack the product into a 4-liter wine jug from the plastic primary.

I use a slotted spoon to remove the floating fruit from the product in the primary. I put the fruit into a standard kitchen strainer and press out as much juice as I can. Note that all my brewing equipment is dedicated to brewing. I never reuse my kitchen equipment in the brewing room.
Depending upon how much juice is released from the fruit and how deep the sediment is on the bottom of the primary, there can be more than 4 liters of clear product in the primary.
So, I start by racking part of the product into a pitcher then rack the remaining product into the jug. I top off the jug from the pitcher. Sometimes you have leftovers.

After another three weeks in the 4-liter jug, the product is racked into a 1-gallon jug.
There typically is enough clear liquid above the sediment in the 4-liter jug to fill the 1-gallon jug (sometimes not quite enough).
The product will be left in the 1-gallon jug for another 3 weeks. Then it will be racked into a bucket and it will be back-sweetened to taste; sorbate will be added; and then it will be packaged (kegged or bottled).
So, nine weeks from pitching yeast to packaging the product.
All these products will be used as examples in a class less than three months after pitching the yeast. They will all be mature enough to enjoy, but a few more months of aging will be beneficial.
There you have it. What are you waiting for? Go make some fabulous fruit mead.


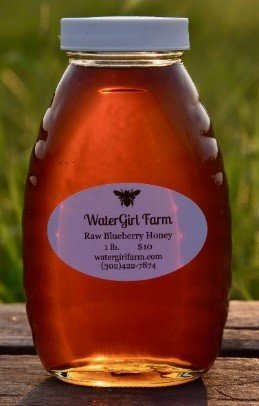 Blueberry Honey


 So what’s different with All Grain versus Extract? For All Grain beer, you’ll be starting with malted barley, and need to convert the starches in it to sugars. This is done in the mash. You’ll need a 10 gallon (or larger) insulated (or heated) container with some manner of filtering out the grain from the wort. This can be done with a stainless steel false bottom, which is something like a colander with smaller holes that sits on the bottom of the mash tun over the spout where you’ll be draining the wort. Or, you can use a bag that you attach to the side of the mash tun. The bags are cheaper, easier to clean, and prevent stuck sparges. The only problem is you’ll have to lift a heavy (water + grain) bag out of the mash tun in order to clean it.
 Using a
  the malt, it’ll be at our expected mash temperature. This is known as the strike temperature. In this instance, my strike temperature came out to be 160 F. We then take the malt and add the hot water to it.
 So while the mash is going, we’ll also heat up water for sparging (rinsing more sugars off the malt). We want this water to be hot (I usually aim for 185 F and boiling), because we want to stop the conversion process, and because we need to get all of this wort up to a boil anyway. I do a 2 step batch sparge. So after draining the mash tun, I’ll dump hot water over the grain and drain it twice. You can do a single batch sparge, or even a continuous sparge (where you have a pump recirculating the mash over the grain).