Category: Pastimes

  • Growing Fruit

    Let’s talk about growing your own fruit. I have been doing it on a small to medium scale for about 20 years. First off, like everything else I have ever had an actual interest in learning about, it is more complicated than it appears at first glance. I started reviving a small neglected orchard (about 250 apple trees) which came with the home we had just bought. I killed many a tree with my “pruning” methods before I got my first apple. In that time I devoured everything I could find at the library on apples, then the agricultural extension agent helped me, but the real breakthrough was the internet. This was the late 1990s and university research programs were just starting to get their info online. I found out that “organic” doesn’t mean just letting the damn things grow on their own. At least in Tennessee, we have more pests and diseases than other areas, and you will not harvest an apple without some type of spray program. Over the years I became competent if not an expert, and I definitely know that I don’t have an answer for every problem. I will start with apples. A lot of the lessons from apples applies to other tree fruit. There is a lot of information, and I thought to break it down into four segments: Planning, Planting and Training, Pest Control, and Pruning and Harvest.


    Planning

    What? I don’t plan, I just plant and reap bushels of natures bounty! Err, No. This is the time to make decisions. Things are complex. The very basic thing you need to know is how much land you have and how much fruit you want. Is it on a hill or in a valley, clay or loam soil, wet or dry? A gentle hill is best, with clear air drainage path to allow cold air a path away from the trees. Any soil that has trees can support tree fruit, but you may need to have supplemental support for certain rootstock/soil types (more on this later). Wet soil is pretty much a no go, the roots of fruit trees are prone to root rots which thrive in wet soils.

    So how much fruit do you want and when? The smallest trees at maturity will produce a bushel (about 45lbs) of apples each. A medium size tree may produce between 4 to 10 bushels. In most cases, all the apples on the tree will be ripe at the same time. What are you going to do with it all? Apples are the most versatile fruit. You can eat it fresh, dry it, make cider (sweet and hard), can it, and store it; but you need a plan. If you just have three medium size trees of different apples, but they all ripen at the same time, you could have 500lbs of fruit to do something with! If you want more than one type of apple, which you should, try to select cultivars that ripen at differing times of the year. This allows you to utilize each apple to the best of its ability. In general, summer apples don’t store well and turn mushy very quickly. They should be eaten quickly, dried, or used for cooking. Fall apples are your mainstay. They will vary, but will usually keep fairly well and are good for most purposes. Winter apples store the best, and storage may actually improve their flavor and sweetness. Cider of varying quality can be made from any apple. Cider making can be very simple, but good cider making is again, complex.

    Now you know where you are going to plant and how much fruit you want, here comes the technical part. What size trees do you want? Since apples reproduce sexually, the seeds of the fruit are not copies of their parents, and their fruits are usually nasty tasting, small, and bitter. Apples are propagated by grafting, meaning that the living limb (scion) of a selected cultivar is attached to the root (rootstock) of another tree, allowing the tree to produce the selected cultivar. In this way, the genetic material from the first cursed red delicious tree is still alive in the orchards of Washington. Most stores and some online retailers list trees as being “dwarf”, “semi-dwarf”, or “standard”. These definitions are based on the type of rootstock the trees are on. A “standard” rootstock is usually just a tree grown from seed with the scion grafted to it. The size is unknown but could be anywhere from 20 to 40′ tall. That’s a big tree. “Semi-dwarf” refers to a range of rootstocks that produce a tree anywhere from 10 to 25′ tall. There is a large number of rootstocks in this category. It would do you well to know what the rootstock is exactly. An ELMA 26 rootstock will grow a tree of about 12′, an ELMA 111 rootstock will grow a tree of about 25′, both are considered semi-dwarf. “Dwarf” rootstocks can usually keep the tree under 10′ and are the mainstay of new commercial plantings. They absolutely require support and are not free-standing, but can produce quickly and in great quantities per acre.

    The mature size of the tree must be taken into consideration prior to planting. If you are planting a “standard” size orchard, the trees need to be at least 30′ apart. That’s a lot of unused space for the first 10 years of the trees life. In my opinion, smaller trees are the way to go. They are easier to prune, spray, and pick fruit. ELMA 26 or ELMA 7 on 10 or 12′ spacing makes for a tree that can be mostly managed without a ladder and doesn’t need support.

    All of this comes before you decide what apple variety to buy. There are a lot of really good varieties that work well in some climates and not at all in others. I can’t grow Macintosh, it is simply too hot here and they fall off the tree before ripening. The best bet would be to investigate a local orchard and see what they are growing or ask for recommendations from other fruit growing people in the area. The big box stores here sell Honeycrisp apple trees, which are notoriously difficult to grow even in their preferred northern climate, and wouldn’t have a chance in the southeast. Speaking of where to buy your trees, I would recommend mail ordering bare root trees. The box store trees sold in pots may have been in those pots for 2-3 years, are likely rootbound, and you usually cannot tell what rootstock they are on. Also, a bare root branchless tree (a whip), will usually outperform a larger tree from a pot planted in the same ground. The larger trees do not adapt as well to the shock of transplanting.

    Now that you have a planting plan, it is time to think about equipment. If you have less than 20 trees, a backpack sprayer is probably all you need. Any more trees than this and I would suggest that you have some type of power equipment, such as a pull behind sprayer on a garden tractor or, for bigger orchards, a tractor with an airblast sprayer. You will also need good quality bypass loppers for pruning, tree support stakes for the early years, and string to train the tree branches. But most importantly, you need to keep the deer away from the young trees. The bastards will eat every leaf and then rub their antlers on the tree, snapping every branch. I hates deer.
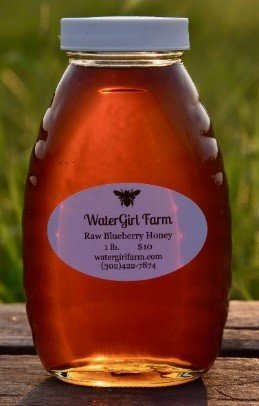
  • What Are We Reading – February 2019

    This has been a month of transitions for the secret cabal of Glibertarians who run the site. Location changes, states of being changes (J.W. has finally had her top surgery and would like to be known as Jedwina going forward), so most of us haven’t done much more reading than rental, tax, medical consent or estate paperwork lately. So if you’ve read something, please fill the howling void left behind and let’s give Jedwina some great suggestions to pick for next month.

    jesse.in.mb

    Not a whole hell of a lot to be honest. I keep chipping away at “Roadside Picnic,” which makes video games like S.T.A.L.K.E.R. and Metro 2033 make more sense, but I always have a hard time with the cadence of Russian genre fiction (translated to English) that I can’t quite put my finger on. I burned through a bunch of the Nightwatch series by Sergei Vasilievich Lukyanenko a few years back, and while I enjoyed them immensely as fluff sci-fi/fantasy, something about the storytelling tripped me up while reading them. I’ve also been picking away at Aristotle’s Rhetoric which is equal parts interesting and dry. Some of the allusions to classical figures allude me for I am not well educated, but it’s been very neat to read up on the art and science of making good arguments.

    Brett L

    I re-read most of Nathan Lowell’s Trader’s Tales from the Golden Age of the Solar Clipper they’re not super complex books, but kind of easy to get into. Its basically Merchant Marines in Space. Some might find them incredibly boring, but I really like them. I also read Smoke and Summons, kind of a weird, steampunk meets magic book about a woman who is somehow bound to and can be forced to channel a demon. She escapes from her evil magician owner and falls in with a thief who just happens to be the son of the head of the church. It was an interesting read, but obviously part of a much larger work. Written by the woman who wrote the Paper Magician, which, come to think of it is how I would describe that book. Oh, and I re-read Seveneves by Neal Stephenson. I wish he’d spent a third less time describing TEOTWAKI and a third more time describing the post-human future. Oh, and a metric fuckton of Microsoft Azure documentation.


    Old Man With Candy

    As you can imagine, my normally limited reading-for-pleasure time has been more limited than normal. But being sent back to the frigid prairies last week, I had books with me on the airplane, chosen less because of an urge to read them, but what’s tolerable among the few that have been unpacked. It had been decades since I had read the Foundation trilogy and my memories were not as fond as the books’ reputation. I spied Second Foundation among the small pile of available books and grabbed it. It’s readable but… that’s about it. It suffered from every fault I remembered: too stuffed with stilted and unlikely dialog, cardboard characters, predictable plot twists. Meh.

    No excuses needed for Frederik Pohl’s The Siege of Eternity, a sequel to The Other End of Time. I think Pohl was incapable of writing a bad book. This isn’t great Pohl, but it is in every way a better book than Second Foundation. And as a libertarian, I enjoy imagining a future where rebellion against government has broken out everywhere, in this case at the instigation of theologically-driven aliens as part of their attempt at conquest.


    SugarFree

    Backed up to read Charles Stross’ The Delirium Brief before finally reading the newest Laundry Files novel, The Labyrinth Index. Still an enjoyable read, but I think Stross is getting bored with writing the series. Another installment without Bob, this time focusing on his psychobitch ex-girlfriend Mahri and her attempt to deal with the United States version of The Laundry, variously referred to as The Black Chamber or the Nazgûl. Anything more would be spoilers.

    It read a wide smattering of short stories about cannibalism and then Shane Stadler’s nasty little foray into torture porn, Exoskeleton. If you’ve been longing for a mash-up of Martyrs, Carrie, and The Boys from Brazil, this is the answer to your prayers…


    Mad Scientist

    Jason Fagone’s Ingenious is a story about several of the colorful characters competing in the automotive X-prize: 100 MPG (or equivalent, for battery power) in a car that could be mass produced. The author knows almost nothing about cars or engineering, so this is mostly a tale of the teams building the things, and which of their teammates they don’t get along with, who they love, and blah blah blah. The book isn’t long on environmental doom and gloom, but it’s definitely in there. Some of the teams surprise you with a decent finish in the competition despite their duct tape and bubble gum build. Others, attempting to use a Harley-Davidson engine to spin a generator, drop out early with completely unsurprising problems: too loud, too much vibration, and too unreliable. But made in America, so, you know, fuck yeah. Overall the book is an engaging read, but you won’t learn anything about vehicle engineering.

  • The Nectar of the Gods


    So, what is mead?  Well, “mead” is a simple alcoholic beverage made with just honey, water, and yeast.  Or, alternatively, “mead” is a sprawling family of different types of alcoholic beverages where the primary fermentable sugar comes from honey.   Mead can be still or sparkling; bone dry or syrupy sweet; low or high in alcohol; and everything in between.  Thus, there are as many different ways to make mead as there are types of mead.  The following diagram shows which products generally fall under the umbrella of “mead”.


    Click to enlarge


    The common element in all these products is honey.  The color, aroma, and flavor of the honey used to make any given type of mead impacts the color, aroma, and flavor of the resulting product.  In a traditional mead, honey is the primary source of the aroma and flavor of the product although the choice of yeast can also have a dramatic impact on the final aroma and flavor as well.  In the other three types of products, we are trying to create a harmonious balance between the aroma and flavor of the honey and the aroma and flavor of the fruit, spice, and/or malt that you are pairing up with the honey.   Note that it is possible to screw this up and produce an unpleasant tasting product without suffering any actual brewing failures (yes, I have done this).  There can be a significant amount of trial and error involved.

    Monofloral versus polyfloral honey:

    The floral sources of the honey can and do have an enormous impact on the resulting mead.  If the bees visit many species of flowering plants when gathering nectar to make honey, the resulting honey is referred to as “polyfloral” honey – usually called “wildflower” honey.  If the bees visit a single species of flowering plant, then resulting honey is called “monofloral” honey – usually called a “varietal” honey.  Note that a product labelled as a “varietal” honey may include other floral sources, but at least 51% of the honey is from the named floral source.

    In general, varietal honeys are produced by placing the hives where commercial agriculture is producing vast fields of a specific crop (see alfalfa, buckwheat, avocado, blueberry, and clover below).  However, a single floral source honey can also be produced in the wild where large stands of a specific plant type – usually trees – are in bloom while few other plants are in bloom (see basswood below).


    Click to enlarge


    Note the dramatic difference in color of these honeys.  There is a corresponding difference in aroma and flavor as well.  Light colored honey tends to have a more delicate aroma and flavor.  However, there are exceptions such as basswood which has intense aroma and flavor in spite of being very light colored.  Dark colored honey tends to have a more robust aroma and flavor.  However, there are exceptions such as tulip poplar honey which is almost as dark as buckwheat but has a very mild, mellow flavor.

    I prefer to work with single-variety honey, because I think the results are more predictable and repeatable.  Wildflower honey can taste great and can make an awesome mead.  But you can only repeat the results if you buy from the same supplier who puts the hives in the same place every season of every year and harvests the honey at the same time each year.  Hobbyists and very small producers generally do this.  But wildflower honey from large-scale producers can be very different each time you buy honey.   In contrast, I have purchased single-variety honeys from different suppliers in different parts of the country in different years and the honey is always recognizable as being the same honey.  Note that terroir and climate affect honey production in the same way that it does grapes.  For example, your Napa Cab is different from your Aussie Cab, but they are both still recognizable as being Cab.  The same thing is true with single-variety honey.

    Let’s take a look at two of my favorite honey varieties to make mead with.  The following descriptions of the honey come from the National Honey Board.


    Tupelo Honey


    Tupelo honey is a premium honey produced in northwest Florida. It is heavy bodied and is usually light golden amber with a greenish cast and has a mild, distinctive taste. Because of the high fructose content in Tupelo honey, it granulates very slowly.

    Blueberry Honey


    Taken from the tiny white flowers of the blueberry bush, the nectar makes a honey which is typically light amber in color and with a full, well-rounded flavor. Blueberry honey is produced in New England and in Michigan.


    Note that blueberry honey gets it aroma and flavor from the nectar of the flowers of the blueberry plant (just like every other type of honey).  Blueberry honey does not taste like the berries that are produced later.


    As you can see, there are dramatic differences in the color of these two types of honey.  Thus, we expect to see dramatic differences in the color of the resulting mead.  Would it surprise anyone that there will also be dramatic differences in the aroma and flavor of each of the mead as well?

    The following picture shows two batches of mead made with roughly the same recipe but different varieties of honey.  The batch on the left is made with Tupelo Honey and Key Limes.  The batch on the right is made with Blueberry Honey and Meyer Lemons.


    These batches are two weeks old and are still actively fermenting.  They have just been racked from the primary and into the secondary.  They will stay in the secondary for 2 to 3 months.  For those with sharp eyes, there is 1 ounce of medium toast French oak beans (cubes) floating in the neck of the carboys.  The oak beans will eventually become water-logged and sink to the bottom of the carboy.

    So, color is all we need to worry about, right?  Well, no it doesn’t work that way.  See the two photos below: Orange Blossom Honey and Goldenrod Honey.  They look pretty much the same; but do they taste the same?

    Orange Blossom Honey is well known for having a bright citrusy aroma and a mildly citrusy flavor.  As for the goldenrod . . . let’s let the producer explain:

    The goldenrod blooms in late fall. It is one if the last flowers to bloom before winter sets in. This is one of the few types of nectar that we can smell as we enter the bee yard. Wikipedia calls the odor “rank”. It does smell like dirty gym socks. But do not let that turn you off to this unique honey.

    I have used goldenrod to make mead.  The honey is not particularly pleasant, but the mead turns out pretty good with a deep earthy aroma and flavor – the magic of fermentation and aging produces a transformation in the positive direction.  As a traditional mead, it works.  It might work in a braggot mixed with dark malts and suitably earthy hops.   But as a base for any fruit melomel, it probably isn’t going to work so well.

    Honey processing:

    The processing of the honey can also have an enormous impact on the mead produced from the honey.  The following definitions also come from the National Honey Board:

    Extracted honey:  Honey removed from the comb and presented in several forms, as defined in the United States Department of Agriculture Standards for Grades: (1) liquid, (2) crystallized or granulated, or (3) partially crystallized. This is commonly known, and referred throughout the document, as “honey.”

    Raw Honey: Honey as it exists in the beehive or as obtained by extraction, settling or straining without adding heat.

    Strained Honey: Honey which has been passed through a mesh material to remove particulate material (pieces of wax, propolis, other defects) without removing pollen.

    Filtered Honey: Honey processed by filtration to remove extraneous solids and pollen grains.

    And then, we’ll borrow a description from Bee Maid on pasteurizing honey:

    Pasteurizing honey is a very different thing than pasteurizing milk or other dairy products, and it’s done for very different reasons. Because of its low moisture content and high acidity, bacteria and other harmful organisms cannot live or reproduce in honey, so pasteurization is not done for that purpose. One of the few things that can live in honey is yeast, although if the moisture content is below 18% (as it normally is), the yeast cells cannot reproduce. All nectar (the source for all honey) contains osmophilic yeasts, which can reproduce in higher-moisture content honey and cause fermentation. While fermented honey does not necessarily pose any health risk, we try to discourage it, so Bee Maid pasteurizes its honey to kill any latent yeast cells that might be present and to remove any chance of fermentation.

    The bulk of honey that is available in grocery stores or big-box retailers has been pasteurized and filtered.  So that stuff in 8 oz jars you buy at the grocery store to put on your biscuits, well that has had the life processed out of it.  From a mead-maker’s point of view, the more processing that is applied to the honey, the greater the reduction in the aroma and flavor of the honey as well as the greater the reduction in the aroma, flavor, and mouthfeel of the finished mead.  To make mead, you need to buy minimally processed honey directly from the producer whenever you can.  The less heat involved in the processing, the better the honey will be for making mead.  {This thing here – the less heat involved – we’ll come back to this topic later.}

    Making Mead:

    Honey is full of yeast.  Dilute it with water and wait.  It will ferment.  Voilà.

    I have a friend that has done this.  He put a bucket of honey and water in his garage and left it there all summer in Missouri.  He came back in the fall and had mead.  He said it turned out pretty good, but I did not get a chance to sample the product.  And I can’t say that I would actually recommend anyone try this, but this is probably how mead was made for several thousands of years.

    At some point in the middle ages, people starting boiling honey and water and then pitching ale yeast.  The following is the oldest written recipe.

    ffor to make mede. Tak .i. galoun of fyne hony and to þat .4. galouns of water and hete þat water til it be as lengh þanne dissolue þe hony in þe water. thanne set hem ouer þe fier & let hem boyle and ever scomme it as longe as any filthe rysith þer on. and þanne tak it doun of þe fier and let it kole in oþer vesselle til it be as kold as melk whan it komith from þe koow. than tak drestis of þe fynest ale or elles berme and kast in to þe water & þe hony. and stere al wel to gedre but ferst loke er þu put þy berme in. that þe water with þe hony be put in a fayr stonde & þanne put in þy berme or elles þi drestis for þat is best & stere wel to gedre/ and ley straw or elles clothis a bowte þe vessel & a boue gif þe wedir be kolde and so let it stande .3. dayes & .3. nygthis gif þe wedir be kold And gif it be hoot wedir .i. day and .1. nyght is a nogh at þe fulle But ever after .i. hour or .2. at þe moste a say þer of and gif þu wilt have it swete tak it þe sonere from þe drestis & gif þu wilt have it scharpe let it stand þe lenger þer with. Thanne draw it from þe drestis as cler as þu may in to an oþer vessel clene & let it stonde .1. nyght or .2. & þanne draw it in to an oþer clene vessel & serve it forth

    A modern redaction of this recipe is:

    For to make mead. Take 1 gallon of fine honey and to that 4 gallons of water and heat that water til it be as long then dissolve the honey in the water, then set them over the fire and let them boil and ever scum it as long as any filth rises thereon. Then take it down off the fire and let it cool in another vessel til it be as cold as milk when it comes from the cow. Then take lees from the finest ale or else yeast and cast it into the water and honey and stir all well together, but first look before putting your yeast in that the water with the honey be put in a clean tub and then put in your yeast or else the lees for that is best and stir well together. Lay straw or else cloths about the vessel and above if the weather is cold and so let it stand 3 days and 3 nights if the weather is cold. And if it is hot weather, 1 day and 1 night is enough at the full. But ever after 1 hour or 2 at the most assay thereof and if you will have it sweet take it the sooner from the lees and if you will have it sharp let it stand the longer therewith. Then draw it from the lees as clear as you may into another vessel clean and let it stand 1 night or 2 and then draw it into another clean vessel and serve it forth.

    This is essentially the process that is used by most mead makers today.  Put honey and water in a pot; boil it; and remove the scum that rises to the top.  The only difference is that most modern mead makers will just raise the temperature of the honey water to 150 degrees or so to pasteurize the mixture and to remove the scum that rises to the top.  This is considered critical by many to getting the mead to clear properly after fermentation.

    Wait a minute.  What was that thing I said earlier – the less heat involved in the processing, the better the honey will be for making mead.  Why would I go to the trouble of getting unpasteurized honey only to put it into a pot with some water and then pasteurize it. This is where a big schism occurs between mead makers.  About two-thirds of mead makers “cook” their honey and water mixture.  The two primary arguments for cooking the honey and water are that it 1) provides a clean slate for pitching whichever cultured yeast you want to use and it 2) removes the proteins and waxes and whatnot that makes it very, very difficult to get mead clear.  The other one-third of mead makers say this is nuts because you are driving off all the aromatics that make the honey and the resulting mead so awesome.  So, I am in that one-third of mead makers that do not cook the honey and water.  I believe that a no-heat process produces superior aroma, flavor, and mouthfeel in the resulting products.

    And it is possible to get crystal clear mead without cooking the honey and water to remove the scum.  The key is using the right fining agents.   In wine making, the particles that cause haze in the wine carry a negative charge.  So fining agents that carry a positive charge will attach to the haze particles, and then they will drop out of suspension.  Wine makers will use egg whites (the proteins are positively charged) or gelatin (also proteins) or bentonite to clear wine.  It works great.  However, these types of fining agents fail miserably with mead because the particles in mead that cause the haze also carry a positive charge (being proteins and waxes and whatnot).  So, to clear mead, we need fining agents that are negatively charged.

    What works well is Super Kleer.  This product is actually two separate fining agents (Kieselsol and Chitosan) that get added to the mead at separate times.  From some website I have lost track of:

    Kieselsol (negative charge): Also known as silicon dioxide. Kieselsol works well with gelatine as a clearing agent, since it acts as a tannin substitute and works well to remove bitterness from white wines. When used with gelatine, the gelatine is added to the wine first, and then 24 to 48 hours later, a very small amount of Kieselsol is added, and should be racked off within 2 weeks. Kieselsol also works with chitosan.

    Chitosan (positive charge): As the name implies, it is composed of chitin, which is the structural element of the exoskeletons of crustaceans, such as crabs, shrimp and other shell fish. Chitosan is especially popular in clearing white wines, since it does not require the aid of tannins to clear, as do some fining agents like gelatine. When used with negatively-charged Kieselsol it is an effective remover of most suspended proteins and solids.

    Chitosan and Kieselsol are often sold as a set, in sealed liquid envelopes as fining A (negatively charged Kieselsol) which is added to the wine first, and then fining B (positively charged chitosan) added about a day afterwards. Chitosan has a reputation for being fairly gentle on the character of finished wine. 

    The following picture is an example of the results of using Super Kleer in mead.  Note that I frequently print out brew sheets to keep track of what I am doing.  I usually lean the brew sheet against the wall behind the carboy.  This image shows 12-point font printed on standard paper sitting just behind a five-gallon carboy full of mead.  When you can read a newspaper through a carboy full of product, the product is clear.


    Now someone out there is thinking “If negative particles make wine hazy and positive particles make mead hazy, will a mixture of wine and mead clear up on its own?”.  The answer is yes, in many cases.  This makes melomels (fruit meads) one of the easier categories of mead products for beginners to make, because melomels are more likely to clear up on their own without using fining agents.

    And that brings us to the end for today.  The next article will be on making melomels with a focus on how to be successful as a beginner with little prior brewing experience.


  • IFLA: The Bifurcated Edition of the Horoscope for Jan 27

    I didn’t buy a new Tarot to use for you all, since my local witchcraft store was closed due to the snowpocalypse.  Yes, you can buy decks on Amazon.com, but they don’t give you valid results unless the cards are sufficiently permeated by nag champa.

    Anyway, the skies are speaking out of both sides of their metaphorical mouth this week.  Kind of appropriate, I guess for the month of the two-faced god.

    The first bit of seeming contradiction (because of course, there isn’t really any contradiction where the Celestial is concerned) are the two planetary alignments.  We have Mars-Terra-Luna (waning) = “strife at home.”  And we also have Terra-Sol-Mercury which means “good news from/about home.”  Obviously the skies are speaking to two different groups of people.  If you’re born between Libra and Aquarius (both signs that feature prominently this week) then you get the good news.  Leo through Aries… I’m sorry, especially since I’m in that group.  Pisces or Virgo?  I have no idea I mean, “your destiny is cloudy and difficult to discern.”

    The second non-contradiction is having the moon in Libra while Venus and Jupiter are in Sagittarius.  We’ve talked about these before —  having such a powerful change sign in the place of balance leads to instability and things generally going amok.  While Sagittarius, when empowered by the two brightest planets brings about things going  well.  The clue here is that Sagittarius isn’t a lucky sign as much as it is a karma sign.  Doing right this weeks brings great rewards, while cutting corners (in a metaphysical sense) subjects you to the pique of irritated stars.

    Beyond that, we have Saturn in Capricorn making people act like doofuses (anything like that happen last week when this sign was also up?) and Mars in Aries giving its buff to getting buff (hit the gym, hit it hard).  We also have something new — The Sun and Mercury are in Aquarius.  This is a good omen for prosperity, return on investment, financial windfall, rewards for effort, crop yields and the like.

    Taken all together, this is a very rewarding week if you show some self-discipline.  Enjoy it.

  • What Are We Reading

    OMWC

    Hardly anything because, well, new job and moving. But my bathroom book for the past week has been Steven Weinberg’s The First Three Minutes, a short tome on the Standard Model of cosmology. Come prepared for some real mental challenge.

    While I was flying back and forth to Arizona, I indulged in a fantastically depressing and wonderful collection of stories, novellas, and a couple of complete novels by my favorite (((author))), A Malamud Reader. Although Malamud is usually lumped with contemporaries like Philip Roth, he really was a far better writer.

    One day, I’ll have time to read again.


    SugarFree

    I have retreated to childhood, reading Piers Anthony’s Split Infinity series for the dozenth or so time. I’m going to be honest: he’s not a great writer, but damn can he churn out enjoyable fiction, and the kind that gets creepier to read the older you get, which is an aspect I like. I started with the Xanth series when I was nine or ten, picking up A Spell For Chameleon–mostly off the Darrell K. Sweet cover, familiar from Ballentine’s paperback series of Heinlein Juveniles–at a bookstore going out of business sale. (My dad’s way of dealing with me over my parent’s divorce was to give me money and turn me loose in a bookstore.) I wandered away from Anthony in high school, around the time I realized was reading books about the panties of little girls in the Xanth books, and the rampant sister-fucking of the Bio of A Space Tyrant series got a little weird, and the Incarnations of Immortality ran out of steam. And, I’ll be honest, I was done with fantasy after, um, certain works were read (Seriously, fuck The Elfstones of Shannara,) and it took years for me to bother reading high or epic fantasy again.


    Riven

    Well, I’ve definitely slowed down some on the Dresden Files, but that shouldn’t be a reflection on the books/stories themselves. It’s my fault for not making time for the important things. I finished White Night, moved on to Small Favor, and then rapidly consumed four short stories set between Small Favor and Turn Coat: Day Off, Backup, The Warrior, and Last Call. I’ve been on the first page of the last short story between Small Favor and Turn Coat for a couple weeks now, but I’m confident that one day, eventually, maybe I’ll finish reading Curses.  … Probably. No promises.


    mexican sharpshooter

    Once again, the only thing of note that I read is a children’s book for my 4 year old.  Today’s entry is Yertle the Turtle by Dr. Seuss.  Yertle of course, really is a turtle.  It is a story I particularly like, because Dr, Seuss explains to children how to deal with assholes, particularly the ones that declare themselves king.

    The story begins when Yertle realizes if he stands upon the shell of another turtle, he can see farther than he could if he stood on his own feet.  Why stand on another turtle’s back?  FYTW.  Yertle eventually declares himself king of all that he sees and continues to enslave more turtles in his quest to obtain more power.  Surprisingly, they all seem to agree to his terms.  Stand upon each other’s shoulders, and let Yertle stand atop them all.

    Except for one.  A turtle named Mack, protested and explained multiple times how much it sucked being at the bottom of the pile.  Yertle responded he was the king, so FYTW.

    Until Mack sneezed.  The entire stack of turtles came tumbling down with Yertle on top falling the farthest distance to Earth.  Yertle spent the rest of his days being king of the mud.  Honestly, this is probably the perfect allegory to explain 2016 to a child.


    jesse.in.mb

    Back in September 2017, I read Marie Kondo’s The Life-Changing Magic of Tidying Up: The Japanese Art of Decluttering and Organizing due to interesting roommate-related circumstances and the pending possibility of moving. My roommate successfully got a job outside of the country and so I figured I’d revisit themes of throwing away all of my shit as I make room for my boyfriend to move in. In that vein I finally picked up The Life-Changing Manga of Tidying Up: A Magical Story. It’s probably a great way to introduce kids to the idea of keeping things tidy and letting go of stuff they don’t want/need. I didn’t really get anything new out of it, but my boyfriend realized most of his instrument collection no longer “sparked joy” and is only bringing his uilleann pipes. 

    The Ruin by Dervla McTiernan was a fun procedural drama set in Galway and its environs that tied together a few disparate stories in pleasing ways. It was an audiobook and the narrator (Aoife McMahon) did a superlative job jumping between different characters in a way that gave them dimension without getting in the way of the story.


    SP

    Inventories of household goods. Bills of lading. Real estate listings and leases. Insurance documents. Utility terms of service. Receipts. Checking account and credit card statements. Truck rental contracts. Google Maps. Hotel booking sites.


    Brett L

    It was a slow month for me. I read the latest of John Conroe’s Demon Accords novel. I can’t really understand why I keep reading them at this point, except that they’re fast, and they don’t take themselves too seriously. Oh, and he’s good a blowing up his fake worlds real good. This one was kind of… not mailed in, exactly, but he needed to move some players from A to B to write the book he really wants to write. Contrived is a better word. Still fun, although he did kind of Harry Dresden genocide most of an alien race. What else? Oh, I did a re-read of Stross’s Iron Sunrise. I’m still sad he couldn’t really salvage that universe, but totally see his point about it being irretrievably broken. And lots and lots of MS Azure documentation.


  • The Harvest – Making Wine

    The grape genus Vitis splits into three natural groups based on geographical location: North American, Eurasian, and Asiatic.  There are roughly 25 to 30 species of American origin and about the same number for Asia.  But there is only a single grape species for Eurasia, the Vitus viniferaVitis vinifera is itself comprised by the wild grape vine Vitis vinifera sylvestris (commonly referred to as V. sylvestris) and the cultivated grape vine Vitis vinifera vinifera (commonly referred to as V. vinifera).  So, all the well-known varieties/cultivars of grapes used for making wine today (such as Cabernet Sauvignon and Chardonnay) are members of a single species of grape vine, V. vinifera, and are the result of some combination of natural mutations and human tinkering over the course of several thousand years.

    There is no clear point in time where the cultivated V. vinifera became distinct from V. sylvestris.  In fact, hybridization occurs naturally between the two subspecies and occurred continuously throughout ancient times.  We know that the native range of that the wild grape vine V. sylvestris included the Mediterranean shores of modern Lebanon and Syria as well the border between Syria and Turkey.  However, there is archeological evidence of grapes being cultivated far outside the native range of V. sylvestris and into the far reaches of Israel, Egypt, and ancient Babylonia inside the geographical known as the ‘Fertile Crescent’.

    The cultivation of grapes did not occur in a vacuum, but was part of the overall development of agriculture in the Fertile Crescent.  Archeological finds indicate that wine was being made on a large scale as early as the 4th millennium B.C, in the ancient city of Godin Tepe in western Iran.  In addition to the traditional archeological evidence of wine making such as finds of broken pottery, some of the pottery still had residue that was subjected to an in-depth chemical analysis that confirmed the presence of grape products (assumed to be wine).  So, in the ongoing debate between wine people, beer people, and mead people over who started brewing first, the wine people now have scientific proof that puts start of intentional wine making back to at least the 4th millennium B.C.

    The cultivation of V. vinifera, and presumably the making of wine, spread from Iran and the Fertile Crescent throughout the Middle East and Turkey eventually making its way to Greece.  The Greeks spread viticulture to many locations around the Mediterranean including Italy and southern France; the Romans continued the spread viticulture throughout Western Europe.  Fast forward through several thousand years of history including the dark ages, the middle ages, and the renaissance and we get to modern viticulture (growing grapes) and viniculture (making wine) using any of several hundred cultivars of V. vinifera which humans have new carried around the globe.

    So how do we make wine.  It’s easy.  Crush the grapes; press out the juice; pour it into a vessel; and wait.  Wine will happen; it can’t not happen.  It might be good wine (lots of great commercial wine use spontaneous fermentation).  But it might be terrible wine as well.  To ensure success then, most wine makers inoculate with cultured yeast (someone got lucky with a spontaneous fermentation and has been culturing the yeast ever since).

    First off, we need to grab some grapes.  I guess we need white grapes to make white wine and red grapes to make red wine, right?  Not exactly.  V. vinifera grapes generally come in two types: green grapes and black grapes.  There are other colors as well, but they are just not as common as green or black grapes.  Regardless of the color of the skin, the flesh of the grapes is generally colorless ranging from pale green (green grapes) to pale grey (black grapes).  And the juice from V. vinifera grapes is also generally colorless ranging from pale green (green grapes) to pale grey (black grapes) – amazing how that works out.  Therefore, white wine can be made from almost any variety of V. vinifera grapes, but red wine is made from black grapes (or blends of grapes where the majority of the grapes are black).

    Thus, we can make white wine from Chardonnay grapes which are green; Gewürztraminer grapes which are dark pink; and Pinot Noir grapes which are black.  Yes, you really can make white wine (Blanc de Noirs); rosé wine (Sancerre Rosé); and red wine (Burgundy) from 100% black Pinot Noir grapes.  How can that be you ask?  Great question.  And the answer is that white wine is made with a white-wine process and that red wine is made with a red-wine process (duh).  The making of rosé wines straddles the fence.

    The white-wine process is as follows:

    1)	Crush the grapes
    2)	Press the juice from the crushed grapes
    3)	Clarify the juice (let the pulp from the crushed grapes settle in a tank)
    4)	Transfer the clarified juice to a fermentation tank
    5)	Inoculate with an appropriate wine yeast
    6)	Wait until fermentation is complete (with some caveats)
    7)	Clear the wine using fining agents or power filters
    8)	Bottle the wine


    Dry white wine is made by letting the yeast consume all the available sugar in the juice.  Semi-dry to semi-sweet wines are made by chilling the fermentation tank to just above freezing right before the yeast consumes all the sugar.  This puts the yeast into hibernation.  Then the wine is power-filtered through increasingly fine filter pads until the live yeast is filtered from the wine.  Finally, a big dose of potassium metabisulfite is added to ensure that refermentation does not occur once the wine is in the bottle.

    The red-wine process is as follows:

    1)	Crush the grapes
    2)	Transfer the mixture of juice and skins (known as must) to a fermentation tank
    3)	Inoculate with an appropriate wine yeast
    4)	Work the must until fermentation is complete
            a. The grape skins (and pulp) still have juice in them
            b. The yeast will ferment the juice in the skins
            c. The resulting CO2 will puff up the skins like little balloons so they will rise up from the liquid below
            d. The skins also form a cap which traps CO2 from the liquid below while it ferments
            e. Thus, the skins will rise up out of the liquid below and will begin to dry out
            f. Fermentation releases heat, so you get warm moist skins which can become a great environment to grow many bad organisms, so
                    i. You push the skins back into the cooler liquid below two or three times a day (punching down the cap)
                   ii. Or you pump cooler liquid from the bottom of the tank on top of the skins
    5)	Release the free-run wine from the tank (whatever wine flows out without pressing)
    6)	Transfer the skins to a press
    7)	Press out the remaining wine from the skins
    8)	Age the wine (typically in barrels, but tanks with wooden slats can be used)
            a. Premium wines typically age the free-run wine and pressed-wine separately to be blended to taste at the end
            b. Bulk wine will have the free-run wine and pressed-wine blended before aging
    9)	Clear the wine using fining agents or power filters
    10)	Bottle the wine  


    Some premium wines will have an extended period of maceration (soaking the finished wines on the skins) after fermentation is complete to extract as much color, aroma, and flavor from the skins as possible.  This is one way to make amazingly intense wines.  It is also a way to make hideously harsh crap.  Know what you are doing if you choose this path.

    Many red wines and some white wines will undergo malolactic fermentation at some point in the process.  Tartaric acid is the dominant acid in grapes, but grapes also have significant amounts of malic acid.  Malic acid is tart and harsh on the palate.  Certain bacteria (Oenoccocus Oeni) will convert malic acid to lactic acid which is softer on the palate and can provide a creamy, oily mouth-feel.  This malolactic conversion is not true fermentation, but it does release CO2 resulting in the appearance of a “secondary” fermentation in the wine.


    Alright, let’s go get some grapes Hmm, you better live on the west coast or near one of the handful of places in the Eastern or Southern US where the climate is moderated by proximity to an ocean, a river valley, or the Great Lakes.  Otherwise, you aren’t getting fresh V. vinifera grapes unless you have friends willing to jointly buy several tons of grapes and pay for refrigerated shipping.  Otherwise you are buying kits.

    Kits range in price starting around $160 for all-juice kits (no concentration); down to about $120 for high-quality concentrate kits; further down to around $80 for mid-quality concentrate kits; and at the bottom around $40 for crappy cans of concentrate.  What differentiates the kits is:

    • All juice is just that. 23 Liters (6 gallons) of pure wine grape juice.  You put it in a fermenter and go.  This provides the truest flavor profile for the wine.
    • High-quality kits are around 16 liters (4 gallons) of juice concentrate. You add 2 gallons of water to get to normal concentration and then ferment.
    • Mid-quality kits are around 10 to 12 liters (2.5 to 3 gallons) of juice concentrate. You have enough water to get to 6 gallons and then ferment.
    • The canned stuff is basically crap.  You add one or two cans of concentrate and a bunch of sugar into the primary.  Then add enough water to get to 5 or 6 gallons.

    The key is that the more concentrated the kit, the less of the true grape varietal flavor and aroma carries over into the final product.  It is possible to buy premium wine kits that have the juice still on the skins, but they are hard to come by.  You need to order in advance from some dealer, and the must comes refrigerated or frozen in 5-gallon pails.  I’ve seen friends use them, but I have no relevant experience.

    So how are wine kits made, in particular red wine kits?  We know that red wine is made by leaving the juice in contact with the skins during fermentation.  But kits aren’t fermented (otherwise, they would already be wine).  Here is one quick summary:

    White grapes are pressed, and the juice is pumped into a settling tank. Enzymes are added to break down pectins and gums, which would make clearing difficult after fermentation. Bentonite is added to the juice and re-circulated. After several hours the circulation is shut off, and the tank is crash-chilled below freezing. This helps precipitate grape solids, and prevents spoilage.

    Red grapes are crushed, sulfited and pumped through a chiller to a maceration tank, where special enzymes are added. These break down the cellulose membrane of the grape skins, extracting color, aroma and flavor. The tank is chilled to near freezing to prevent the must from fermenting. After two to three days the red must is pumped off, pressed and settled much the same way as the whites.        

    When the tank is settled, and the juice almost clear, it is roughly filtered, the sulfite is adjusted, and it is either pumped into tanker trucks for shipment to the kit facility, or into a vacuum concentrator.

    Vacuum concentrators work like the reverse of a pressure cooker. By lowering the pressure inside the tank, water can be made to boil at very low temperatures. By boiling the juice at low temperature browning and caramelization are prevented. The water comes off as vapor, leaving behind concentrated grape juice. Because some aromatic compounds can be carried away in this vapor, a fractional distillation apparatus on the concentrator recovers these essences, returning them to the concentrate after processing.

    Enzymes are used to extract color, aroma, and flavor from the skins of black grapes.  They do a good job of capturing the basic flavor profile of the grape variety, but it is not the same as fermenting on the skins.  It is similar to making beer with extracts versus all-grain.  You can get good products from extracts, but finesse is only achieved through total control of the mashing process.  It is the same story when making wine.  Concentrate kits make good wine.  Exceptional wine requires working with fresh grapes.

    So, what does an aspiring winemaker do if he doesn’t live where V. vinifera is grown and doesn’t want to work with kits?   The answer is hybrid grapes.

    Starting in the late 1800s, the French had a little problem.  Some “important person” in Germany imported grape vines from the United States to plant as curiosities.  Top Men did that kind of thing for amusement – creating gardens of plants from around the world.  The problem is that North American grapes evolved with a nearly microscopic insect called phylloxera which eats the roots and leaves of the grape vines (the insect lives underground all year except for a few weeks when they go airborne to reproduce).  It turns out that V. vinifera had a bit of trouble dealing with phylloxera, and phylloxera destroyed 3 million acres of vines in France.  Wine production was cut in half, and the trend was going from bad to worse.    Fortunately, some professor in Missouri figured out you could graft V. vinifera to American rootstock and the vines would survive, even thrive (and that’s an entirely different article).  European wine was saved!

    Until the gentlemen from Missouri saved the day, viticulturists (people that grow grapes) in France were frantically trying to hybridize V. vinifera with American grapes to get something to survive.  And they had some successes.  Several French/American grape hybrids were produced then that are now grown throughout the United States, but they have since been regulated out of existence in France to preserve the cultural integrity of French wine (and because the grapes aren’t anywhere near as good V. vinifera).  In the 1940s, a Wisconsin farmer named Elmer Swenson began hybridizing the French/American hybrids with American species found in the upper Midwest trying to find varieties that would survive in cold climates.  Elmer also had a lot of success.  Many of his grape varieties are in production around the Midwest.  In more recent years, Cornell University in Geneva, NY and the University of Minnesota have continued to have great success creating many new cold-hardy varieties.   Thus, wine grapes can now be grown in many places where V. vinifera cannot.  And while many of these varieties can produce wine that is quite good, none of them have reached equality with V. vinifera.  But if you live in Iowa and want to make wine with local grapes, you need to make do with the hybrids that grow close by.

    Finally, let’s make some wine.

    Remember that apple crusher we just bought to make cider.  I got bad news.  It won’t work.  You need to go drop another $500 on a grape crusher/destemmer.  You put the grapes in the hopper and turn the crank.  Crushed grapes fall out of the bottom, and the stems traverse a down a long tube of sorts to the end of the destemmer.  The destemmer part works, mostly.  But you still need to stick your arms into the crushed grapes and pull out the pieces of stems that make it all the way through.

    Crushing and destemming the grapes.


    Then we’ll splurge and buy a nice big wine press.   It’s big, and it’s heavy, and it’s awkward.  So, we’ll mount it to a platform with castors – castors that don’t lock.  Note when I say we, I mean the dude that bought the press; it ain’t mine.   Since the castors don’t lock, make sure you have 5 or 6 other people around that are willing to grab on to handles that don’t exit to hold the press in one place while you crank away.


    Pressing the grapes.


    And the beautiful juice flows out of the press.  Wait, why isn’t it colorless.  I was told that black grapes produce colorless juice.  Well, that’s V. vinifera.  This is a lovely French/American hybrid called Frontenac created by the wonderful folks at U of MN.  Unlike V. vinifera, the pulp of Frontenac is purple and the juice is a vivid red.  Even though we are following a “white-wine” process and pressing juice from the fresh grapes, we will be making a medium-bodied red wine.  The reason we are not fermenting on the skins is that Frontenac is notorious for smelling of green vegetation (i.e., like “someone just opened can of green beans”).  The common wisdom is that avoiding skin contact during fermentation reduces the undesirable aromas in the wine.


    Frontenac produces vivid red juice.


    Oh, and the acid level of Frontenac is about double the acid level of high-quality V. vinifera grapes.  So, don’t be thinking you’re making a nice dry red wine.  You’ll be making a sweet wine (or in my case, a type of mead called pyment).  There’s reason why no one pays 50 bucks for a nice bottle of Frontenac from Iowa.


    Disposing of the cake.


    Once all the juice has been extracted from the grapes, the outer frame is disassembled exposing the “cake” which is the dry, compacted grape skins.  In this case, a nylon bag is used as a screen to prevent the skins and seeds from being pushed out between the wooden slats in the frame.  The cake is dumped into a handy bin and then disposed of in a way that honors Gaia (e.g., composting, feeding to livestock, sending it FedX Ground to your Representative, etc.).

    Now you are ready to head to the brewing room.  Refer back to “Waiting is the hardest part”.  Fade to black.

  • Enslaving Yeast – Brewing an All Grain Beer

    That’s it.  We’re at the end.  Today we’ll go through the steps to make a beer starting with some malted barley, some hops, water, and yeast.  I just recently brewed up a batch of my Saison, which has been tweaked to my tastes, and is fairly popular with visitors:

    Saison:Three of the four ingredients

    Yield: 5 gallons

    Grain bill (assuming 80% efficiency)
    6 lb 2-row
    4 lb Pilsner (preferably Belgian)
    1 lb Crystal 8L
    1 lb Malted wheat

    Mash at 148 F for 90 minutes

    90 minute boil with the following hop additions:

    1.5 oz Saaz (2.8% AA) at 90 minutes
    .5 oz Saaz (2.8% AA) at 20 minutes

    This should end up with an OG of ~1.050, and a FG of ~1.008 for about 5.5% ABV

    Pitch with a saison yeast (I usually use 565, but used a new one for this batch).

    Mash TunSo what’s different with All Grain versus Extract?  For All Grain beer, you’ll be starting with malted barley, and need to convert the starches in it to sugars.  This is done in the mash. You’ll need a 10 gallon (or larger) insulated (or heated) container with some manner of filtering out the grain from the wort.  This can be done with a stainless steel false bottom, which is something like a colander with smaller holes that sits on the bottom of the mash tun over the spout where you’ll be draining the wort.  Or, you can use a bag that you attach to the side of the mash tun. The bags are cheaper, easier to clean, and prevent stuck sparges. The only problem is you’ll have to lift a heavy (water + grain) bag out of the mash tun in order to clean it.

    There are two main enzymes that will break the starches into sugars, Beta Amylase and Alpha Amylase.  Now, these two enzymes have different temperature ranges that they’re most active in, for Beta Amylase, that range is 131-149°F; for Alpha Amylase, that range is 145-158°F. Anything above those temperatures will denature (break) the enzymes, and they’ll stop working.  The lower the mash temperature, and the longer, the more fermentable sugars you will get from the grain. The higher the mash temperature, the more unfermentable sugars you’ll get. Too high of a temperature (or too short a mash time), and you’ll have unconverted starch in the beer instead of sugar.

    MaltUsing a calculator, we figure out what temperature we need to heat the water up to so that when it is mixed with Mashingthe malt, it’ll be at our expected mash temperature.  This is known as the strike temperature. In this instance, my strike temperature came out to be 160 F. We then take the malt and add the hot water to it.

    During this part of the process, you’ll want a mash paddle, which is used to stir up the mash and break up any dough balls that form.  You can use a big whisk (or spoon) if you want, but stay away from the $5 cheap plastic mash paddles, they do not work all that well for batches over 1 gallon..

    Then we put the top on the mash tun and wait, stirring it every once in a while if you so desire (which will up your efficiency a bit).  So since this is a 90 minute mash, we’ll take this time to discuss efficiency. There’s two main measures of efficiency that matter to the home brewer: Brewhouse efficiency – how much of the sugars did you get to out of the malt and into the fermenter at the end of the day (80% is a good standard to reach for); Conversion efficiency – How many of the sugars did you get out of the malt.  These numbers will be different, because there’s going to be some loss in water absorbed by the grain, left in the mash tun, and left in the boil kettle at the end.

    First RunningsThird RunningsSo while the mash is going, we’ll also heat up water for sparging (rinsing more sugars off the malt).  We want this water to be hot (I usually aim for 185 F and boiling), because we want to stop the conversion process, and because we need to get all of this wort up to a boil anyway.  I do a 2 step batch sparge. So after draining the mash tun, I’ll dump hot water over the grain and drain it twice.  You can do a single batch sparge, or even a continuous sparge (where you have a pump recirculating the mash over the grain).

    All of these runnings will go into the boil kettle and brought up to a boil.  At this point, you follow the same steps as you would for an extract batch. Now you just have to clean up your mash tun, and decide what to do with the spent grain.  The grain still will have some sweetness to it, and can be used to feed livestock, dried and ground into flour, or used in its current state to make spent grain bread.

    And for sitting through all of these columns, here’s a bonus recipe:

    English Mild

    Yield: 5 Gallons
    OG: 1.034
    FG: 1.008
    ABV: ~3.3%

    60 Minute boil

    Grain bill:

    4 lb Maris Otter
    1 lb Crystal 90 L
    1 lb Crystal 30 L
    1 lb Carapils

    Mash at 150 for 90 minutes.

    Hops:

    1 oz East Kent Golding (7.2% AA) at 60 minutes

    Ferment with a Dry English Yeast (I use WLP007 for this one)

  • Enslaving Yeast – All Grain Beer Part 3 – Water and Yeast

    Today, we’re at the last two ingredients used in beer.  Both of which are more complex than any of the ingredients we’ve talked about so far.  That’s right, now it’s time to talk about water and yeast.

    Water is usually the last thing most homebrewers start researching, which is somewhat strange since 90% of beer is water.  Water chemistry is why there are different styles of beers associated with different regions. The water sources used in those historic breweries were well suited for specific beer styles.  The brewers may not have understood the water chemistry, but they knew which beers tasted better when they made them. One of the most important of these towns is Burton-on-Trent and you can buy Burton salts to this day to adjust the chemistry of your brewing water.

    Most of the larger commercial breweries today will user reverse osmosis filters to make a neutral water, then adjust the water to what they want with additions.  Homebrewers do have the option to do this as well, but it increases costs, and prep time. If you want more visibility into what your tap water has in it, you can either contact your municipal water department, or ask at your local homebrew shop.  If you’re on a well or other water source, you may need to spring for the water test yourself.

    If you want to start making changes to your brewing water, Bru’n Water is a highly regarded site and source.  Be warned, it’s a deep subject and it can be really easy to get into the weeds here.  Another option is to brew a variety of styles, and see which ones you’re happy with and focus on them.  Then work on adjusting the water chemistry to better match the styles that you’re not happy with the results of.

    Yeast is the other dark art ingredient.  There’s an old saying in the brewing world that brewers make wort, yeast makes beer.  You’ve spent time and money to make this wort, and now you throw a living organism in there to spoil it in a very specific way.  While I named this series Enslaving Yeast, really you’re going to be building an all expense paid, luxury resort for the yeast and throwing them in.

    There’s two major families of yeast strains used in brewing: Ale, and Lager.  In general, Ale yeasts (top fermenting) can tolerate higher temperatures, and will produce more flavor notes.  Lager yeasts (bottom fermenting) need a lower fermentation temperature, and will generally be a slower ferment.

    The key to a good fermentation is healthy yeast.  The key to healthy yeast is making sure the proper nutrients are there, you pitch the correct amount of yeast, and the yeast is healthy to begin with.  One of the easier ways to do this is with a pitch rate calculator.  This will estimate how many healthy yeast cells you’re throwing into your wort, and how many you’ll need for a good clean fermentation.  The reason you want healthy yeast is to make sure they reproduce faster then wild yeast or bacteria, and you get the flavor profile you want.

    Another option is to make a starter (which you can also use to make extra yeast to set aside for a later batch).  To make a starter, mix up some fermentables (DME is the preferred one here) with water in a ½ to 1 gallon jug (or flask if you want to look fancy), put on an airlock, and shake it up on a regular basis.  You can also buy (or build) a stir plate to keep the yeast agitated for the day or so it will take for them to propagate enough. Then you can cold crash the starter, pour off the liquid (which would technically be a very flavorless beer), and pitch (or save) the yeast.

    If you want to harvest yeast from a commercial source, save some dregs of a bottle conditioned beer, and pitch those into a small starter.  Step that starter up a couple of times (say from 16 oz. to 32 oz. to 64 oz.) and you’ll have a viable amount of yeast to pitch. Keep in mind your sanitation here, and some brewers do use different strains of yeast to bottle condition their beers then they do to ferment them.  There’s quite a few threads around on the homebrewing forums talking about who uses what.  I’ll say that I detected no difference between the Saison DuPont yeast and the WLP565 in a batch I made.  Also, that if you go with Ommegang yeast, it ferments hard and fast… use a blow off tube.  Harvesting dregs is also one of the few ways you can attempt to culture some items such as the lambic blends (for sour beers).

    The last thing you’ll want for your yeast is a stable temperature range in their preferred temperature range.  Different yeasts have different preferences, and they will generate heat themselves as they go through the fermentation process.  While temperature control is generally believed to be really important, as long as you have stable temperatures, you’ll generally be able to make good beer (so don’t put it next to a heating/AC vent).

    That’s the ingredients, next we’ll go through the mash.  The only difference between all grain brewing and extract brewing.

  • Bee Business


    How does one get interested in something?

    I see the Glibs with their skilled hobbies, doing things, making things. I’m not a creative type person, I don’t see the same things when I see a block of wood or piece of metal or an old car that lots of other people see. It’s not that I don’t enjoy those things when someone else creates it, I just see the literal thing.

    Instead, I see a seed growing into a plant or a tree or a flower. That I understand. Those things that don’t require any input from me, except maybe for a little care or water or fertilizer. A few years ago a friend invited me to watch him work with his honey bees. Like many or most I had my own ideas as to avoid getting involved; who wants to get stung by those thousands of angry bees? He seemed to know quite a bit, had the suit and hat and seemed oblivious to the dangers I saw. Then we took the frames with the honey to his daughter’s house one Sunday; it was like a party, other people had brought a few frames and I got involved in the processing a little, the spinning and the bottling and was rewarded with a jar of honey to take home. Now I really was interested.

    The following Spring my friend asked me if I wanted a hive. He would help me, loan or give me the necessary equipment. He gave me enough to set up a hive and even assembled it out in my yard and I was in business, sort of. I still had no idea of what was going on, but I was helping him and in turn he was helping/teaching me but I still wasn’t too involved in the actual process. We weren’t doing very well; we did everything he knew, but our production was rather limited. Seemed like we weren’t progressing very fast.

    Then he decided he wasn’t interested anymore and his daughter kind of got tired of us spreading sticky honey all over her kitchen floor and leaving her to clean up the house and the equipment. She asked if I wanted to borrow her extractor and associated equipment. I had space to store all the equipment inside my garage, along with most of the excess (old and dilapidated) hive boxes and frames. Then I found a young guy (about 50 years old) that was interested and he bought a bee suit and I loaned him some of the equipment I had borrowed. We still weren’t very productive, our ROI was always between very negative and deeply negative.

    We did that for a couple years, and a visiting fishing friend was here and was a long time beekeeper with lots of expertise. He looked at our setups and taught us some things we weren’t doing, and that year production shot up. He came again the following year and showed us more of his knowledge and skills, and he worked barehanded with only a hat and veil. Our production has soared for the last 3 years. We’re a long ways from professionals, but it’s sure a lot more fun when the honey is plentiful. Best of all we have a party at the extraction time, with Minnesota Hot Dish Pot Luck being on the menu. Most of my friends and neighbors are rather experienced (old) cooks so the food is good/plentiful and highly seasoned for Minnesota people, ketchup and mustard–but not Dijon–being the staples.

    Now, for those who are still reading this, I’ll try to pass on some of the things we do.

    We tend to think that beekeeping is only important in the summer when the bees are active, but it really is a year round project, with not much going on in the off season but still a little. We don’t winter our bees over; we have tried but the winters here are too severe. We’ve tried covering them, moving them into a shed, surrounding them with bales of hay. Nothing worked. There is hive clean up in the off season however.

    What is needed to have bees and to extract the honey, one of the main purposes of having bees?

    Equipment needed

    A hive, consisting of 2 brood boxes and 2 supers (boxes)
    A feeder tray
    10 frames for each box (actually more are necessary)
    A top cover
    A base boar

    For the skilled wood craftsman with a table saw, the boxes are fairly simple to make. For me, however, I buy them precut and assemble them myself. This is a wintertime project that gets me thinking about spring. If you are lucky enough to find some good condition hive boxes on Craigslist or a weekly shopper, even better. The problem with used equipment is there could be diseases or pests included.

    A feeder. Here in Central Minnesota our bees come early enough there isn’t any nectar yet available for the bees and they have to be fed. We buy some premade stuff that’s supposed to have protein, but sugar syrup or corn syrup is often used. Follow the recipe for the sugar syrup.

    A smoker. They are fairly expensive, about $45 or so but essential. We use dry red pine needles for fuel, creates great smoke.

    A hat with a veil. I use a broad brimmed hat with a mosquito net. A bee hat/veil is better, it keeps the bees away from your face better than a mosquito net. Again, pricey, $45 or so.

    Long gloves that extend over your sleeves, they have to be flexible enough to use tools but tough enough that the bees can’t sting through them. Kiss another 30-40 bucks away. I use yellow cotton gloves (Mr Cheapskate) but I sometimes get stung around the wrists when the jacket sleeves pull up.

    A bee keeper jacket is nice because the veil is zipped directly onto the jacket. Mr CS wears a buttoned up shirt, a jacket zipped all the way up and mosquito net pulled over the turned up collar. So far haven’t gotten bit around the neck or face lately.

    A frame tool, about 7-8 bucks but a screwdriver or a flat bar tool for pulling nails would work. The frame tool is a little better. The equipment is available on line, I use Mann Lake Bee Co, mainly because they are only 50 miles away and they have an online catalog as well.

    That’s pretty much all the start up equipment.

    OK, you found some clean hive boxes and other associated equipment on Craigslist. Buy it all or at least twice as much as you think you’ll need. Make a package offer. Not many people are going to be interested in it, the seller wants to get rid of either the equipment or his/her spouse because often those things may not be compatible.


    Where to start

    Now that winter is here and all the bee stuff is in my garage, it’s time to start cleaning the hive boxes and frames. Bees are hard workers but tend to be a little untidy inside the hive. They glue everything together with a homemade glue called propolis. I scrape the propolis from the frames and the boxes; it has hardened into something like amber and requires a little work. I like the frames to be clean at the beginning of the season so they can be removed for inspection or moved around inside the hive box.

    OK, we’re all cleaned up and finally it’s time to set up the hive in preparation for the bee arrival. I haul my stuff to a location near my garden. It’s a small platform about a foot high and about 6 feet long, big enough for two hives. Has an electric fence around it to keep out bears. We’ve had a few problems over the years and on one occasion required terminal action.

    The assembly is bottom board, 2 brood boxes, each with 10 clean frames, feeder tray and top cover. That’s it.

    We’ve pre-bought the bees at Mann Lake Bee Co, (Hackensack, MN) and have an appointment on the Saturday after the bees arrived from California, in a 40 ft trailer, usually in May.

    We have a ritual. My partner, another friend and I go to pick up the bees. I drive my pick-up. We leave early enough to stop at a country restaurant for breakfast, one of my friends picks up the tab. At Mann Lake it’s a mad house, even though we have an appointment, everyone, including us, arrives a half hour early. There are hundreds of anxious customers. Mann Lake is prepared with lots of people working invoices, sales and helping with the loading. We pick up our protein syrup and any ancillary equipment that we need, head for the bee barn, a greeter takes our invoice and brings out our order of 4 boxes of bees. Bees are sold by the pound; we get 3-pound packages, roughly 10K bees plus a viable queen per pack. The bee boxes remind you of the screened frog boxes you kept your frogs in before they all died waiting for your dad to find the time to take you fishing.

    My partner has essentially the same set up at his property, platform/fence/etc. Now we don our bee apparel. We put out his bees first, we spray them with sugar water through the screen, immediately they go into an eating frenzy, cleaning themselves and unconcerned about us. They get roughly dumped into the brood box, my partner opens the queen enclosure and gently places the enclosure in the top brood box. Next comes my attempt to pour the super elixir into the feeder tray, which is now on top of the brood boxes. Cover with the top cover and voila! Do #2 hive and we’re finished. Go to my house and repeat.


    After about 2 weeks we will inspect the hives by checking the feeder trays, refilling if necessary.

    Usually by this time the bees are finding enough nectar to support themselves. If they seem to be doing well we’ll remove the feeder tray and replace it with a hive box with the clean 10 frames. Now we are hoping that the queen is alive and making babies. We are hoping that in another 2 weeks some of the frames will be filling with honey. I will be doing a visual inspection about 3 times a day, mainly ’cause I am curious and have lots of time, to see if the bees are bringing in pollen.

    OK, now it’s been 1 month since we set up the hives and put in the bees.

    We do a serious inspection and find some frames are full of honey and capped with wax. We will pull those frames and replace them with empty frames. The honey frames will be placed in plastic bags and put in a freezer in my garage, to avoid any problems with bears or other bees robbing the hive. About every 2 weeks all summer we’ll pull full frames, replace with empty. Sometimes the queen will have moved up into the hive box and begun laying eggs in it. Then we have to use our second hive box so at that point we’re 4 boxes high (2 brood, 2 hive). Happens frequently.

    We have about a 3 month season here and with good luck we’ll have close to a 100 or so frames of honey. On the last pull, always the second week end of September, we’ll close out and take all frames that have enough honey in to make it worthwhile. The last step in this stage is to move the bees from my house to my partner’s property. Now instead of 10K per hive we’re looking at 30-40K per hive.


    All summer the bees have been rather docile, now they are agitated, we have stripped most all of the honey.

    We have the smoker pouring out smoke, that seems to help a little to quiet them down. I pick up a brood box and carry it to the truck. There are thousands of bees that are eager to bite me, I’m the Cheap guy with the short yellow gloves and they have found the skin around my wrists. Finally we get them into the truck, minus those that were flying or foraging when we were busy moving them. Without headgear/veils it would be impossible. This past September, I got hit 7 times that day; the stings aren’t so bad but always itch for a few days. We haul the bees about 5 miles and put them with my partner’s bees. We move the bees to avoid having them around on the following Sunday when we spin out the honey. If we didn’t move them we’d have those bees trying to recover the honey that we had taken all summer and it would be tough to try to work. Innocent folks would get stung.

    Now comes the good part.

    After the rather routine stuff all summer comes the Honey Harvest. On the 3rd Sunday of September we spin out the honey. We have an extractor that looks like an old fashion ringer washing machine tub. On the day before, I have taken all the frames out of the freezer, put them into empty hive boxes, warmed them up so the honey would flow easier. Early Sunday we start to work, uncapping the frames, spin them in the centrifuge and strain and bottle our work. We have a crew that shows up, some fly in from Dallas/Seattle, some come from Minneapolis. Guests show up about 10-11 AM and the finale is at noon when all the ladies bring out their secret recipes of hot dish and we have a great pot luck lunch. We eat and go back to work, the guests renew their acquaintances and start to drift off. The following day I’ll take a hot water hose out and wash the equipment, let it dry for a day or two and cover it up ’til the next season. Easy-peasey clean up.


    Many years ago we started with chips/dip and venison sticks, now its become a great buffet. This year we had about 40 people, some were classmates. The Pope came and blessed our endeavors, hopefully in 2019 we’ll have more Glibs, all are welcome. Family friendly, entertaining, educational.

    If any Glibs are interested,  go on line to Mann Lake Bee. See their catalog. I have seen hives in Austin, TX, in the city, easy for urban dwellers if you have a privacy fence. Check locally for bee keeper associations, find a club, or best of all, find a partner with some knowledge, help him for a year or two, watch YouTube videos. Don’t expect to make any money selling honey, the equipment is too expensive unless you are serious.

    We don’t sell any, just give it away for gifts. One has a lot more friends when one is gifting honey. I’ve heard that there is some potable beverage that can be made with honey and other ingredients. I’ll be happy to entertain questions.